Motivation:
Most of Windows machines are delivered with a limited Windows version and unnecessary preinstalled software.
You want to format the hard drive and install a fresh Windows that can be booted from UEFI secure boot to improve machine performance and stability.
Prerequisites:
You need to have a 8Gb USB stick and an ISO file of Windows 10, version 21H2 or Windows 11, version 22H2 updated May 2023.
Note: Use the command below to check the checksum of the ISO file and ensure its authenticity.
certUtil -hashfile Win10_x64.iso SHA256
certUtil -hashfile Win10_x64.iso SHA1
Solution:
Step 1: Backup your machine and create an USB recovery by entering “Create a recovery drive” text to the search box on the task bar and follow the instructions.
Step 2: Create a bootable USB with Windows installation files.
2.A. If you plan to install Windows 11, you can use Windows 11 Installation Assistant to create a bootable USB (click Download Now link below Create Windows 11 Installation Media section).
2.B. If you plan to install Windows 11, you can also download Windows 11 Disk Image (ISO) for x64 devices, then use Rufus to create a bootable USB and enable a local Windows account.
2.C. If you plan to install Windows 10 then you can use the commands below to create a bootable USB.
- Right click Windows logo, click Command Prompt (Admin).
- Enter diskpart.exe, press Enter.
DISKPART> list disk
DISKPART> select disk 1 -- the USB disk should be selected, the number may be different in your machine.
DISKPART> clean
DISKPART> create partition primary size=1024
DISKPART> select partition 1
DISKPART> active
DISKPART> format quick fs=fat32
DISKPART> assign
DISKPART> create partition primary
DISKPART> select partition 2
DISKPART> format quick fs=ntfs
DISKPART> assign
DISKPART> exit
Step 3: Boot your laptop using the USB.
- Plug the USB to a machine.
- For a Dell laptop, power on the machine, press F12 until a one-time boot up menu appears. Select the option to boot the machine from the USB. (You may need to access BIOS to select the UEFI option for Boot Sequence, and select the AHCI option for SATA operation).
- For a Sony VAIO laptop, power off the machine, then press the Assist button to enter VAIOCare. Select the option to boot the machine from the USB. (You may need to access BIOS to enable the option to boot the machine from an USB).
- For a ThinkPad laptop, power on the machine, press F12 until a one-time boot up menu appears. Select the option to boot the machine from the USB. Alternatively go to Settings > Update & Security > Recovery, click the Restart now button under the Advanced setup section and follow the instructions to boot the machine from a USB.
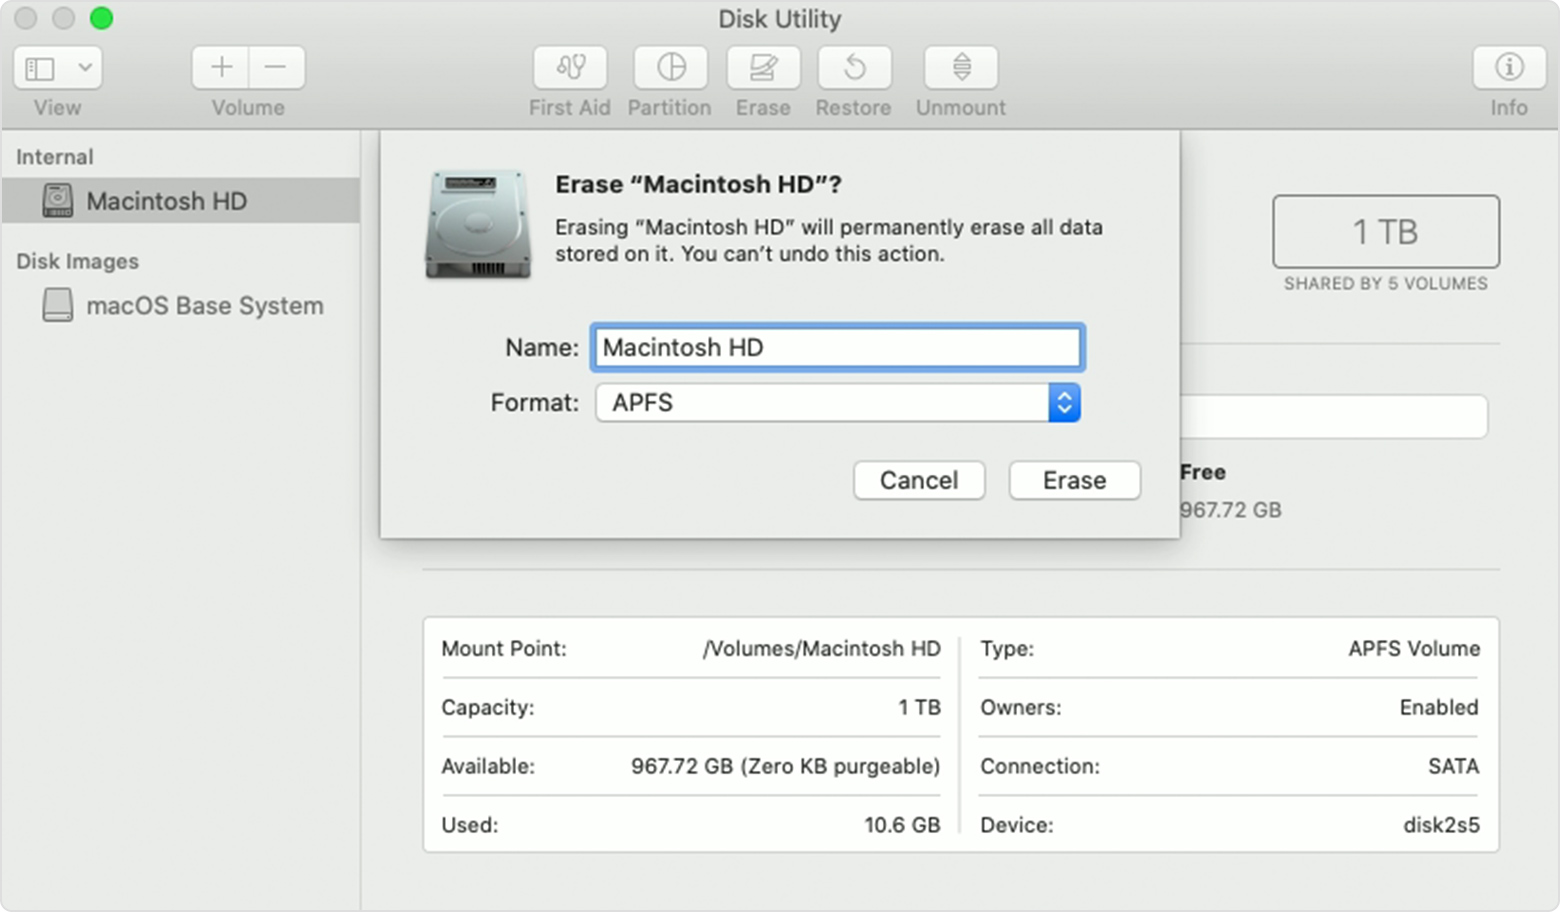
Step 4: Install Windows.
- If your laptop is NOT officially supported by Windows 11, then on the first screen asking you to choose the language of your install, press Shift + F10 or Fn + Shift + F10 to open Command Prompt. Then type regedit and press Enter. Then locate the HKEY_LOCAL_MACHINE\SYSTEM\Setup key. Then create a new LabConfig key. Then click on the LabConfig key, and create 3 DWORD (32-bit) Values named BypassTPMCheck, BypassSecureBootCheck and BypassRAMCheck and set each to 1. Then click View menu item, then click Refresh. Then close the regedit program and the Command Prompt, and continue the setup process.
- Follow the instructions to install Windows.
- Set Windows partition size to 123748Mb for DellXPS if you want to have a 120Gb C drive, or 614516Mb for DellPrecision if you want to have 600Gb C drive, or 819815Mb for ThinkPad if you want to have a 800Gb C drive.
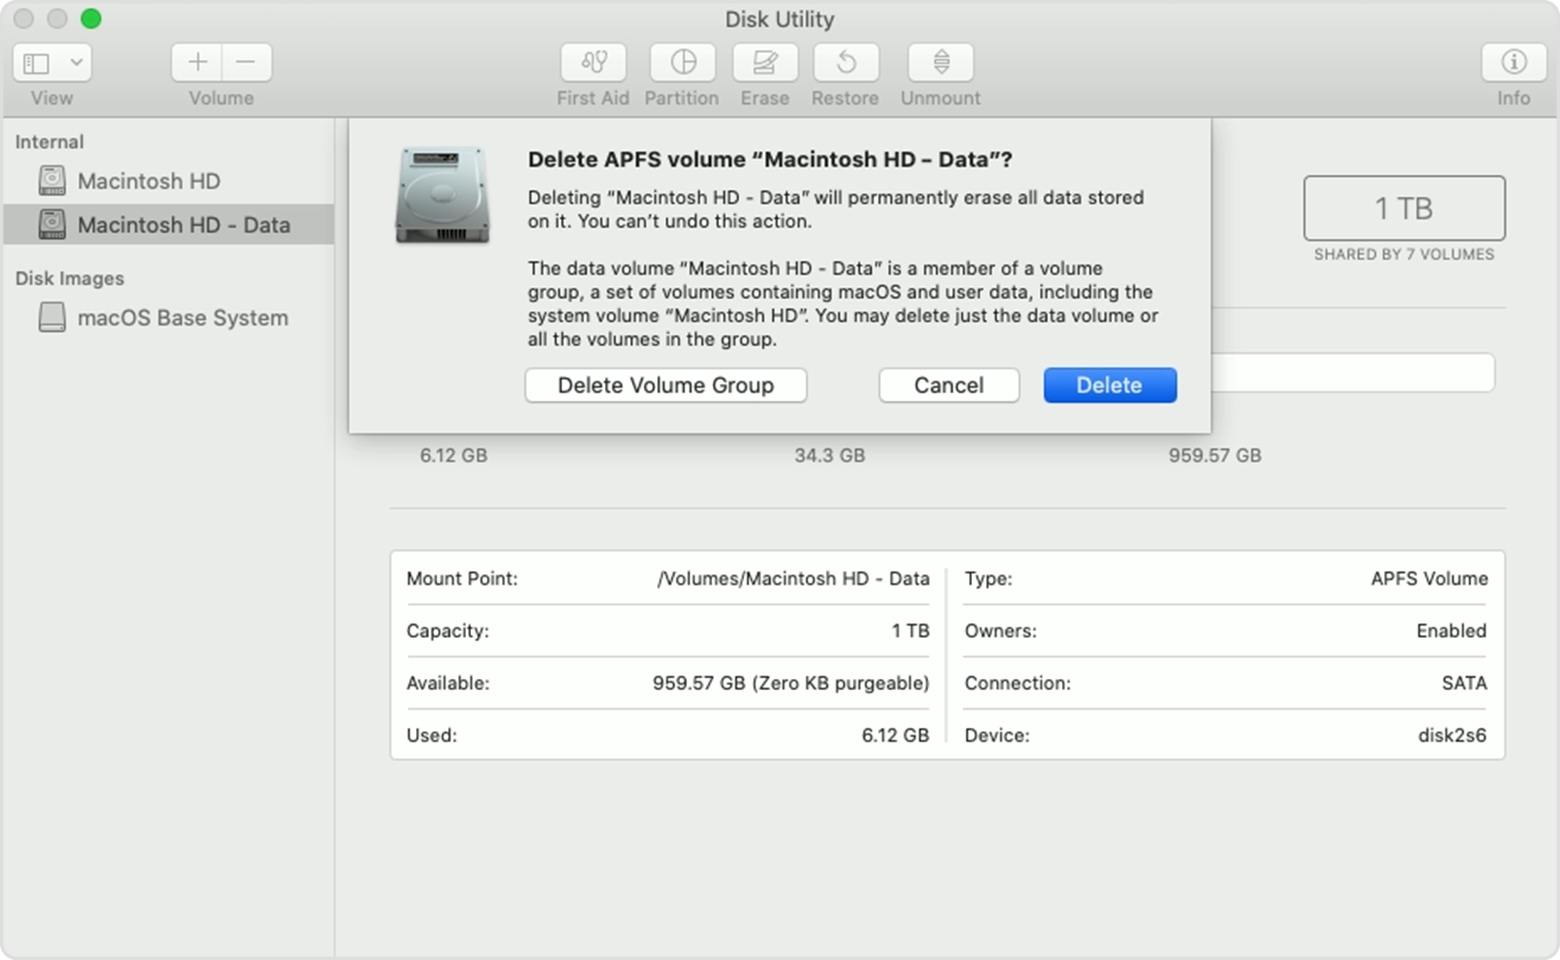
- You can delete all the partitions, including MRP (Microsoft Reserved Partition – this is just a reserved partition for Windows later use if needed), ESP (EFI System Partition – this is where UEFI firmware files are stored to boot Windows), WINRETOOLS (Windows Recovery Environment (WinRE) Tools – this is where files for repairing or recovering Windows are stored), and PBR image (this is where original the manufacture Windows installation file are stored) because you already created an USB recovery in the Step 1.
Step 5: Allow Windows to be configured without the Internet.
- Press Shift + F10 or Fn + Shift + F10 to open Command Prompt.
- Type oobe\bypassnro.
- Press Enter.
- Setup will reboot your computer and after reboot, you will get I don’t have Internet option, and then Continue with limited setup option, to skip the Internet requirement.
Step 6: Configure Windows.
- Change Computer Name, turn off System Restore, enable Remote Desktop,
- Change Time Zone.
- Add Wireless LAN Service feature for Windows Server 2019.
- For a Dell laptop, install Dell Wireless 1820A 1830 WiFi Driver. Set battery charge threshold value to 50% in BIOS.
- Turn on Network discovery and file sharing by clicking on Network icon on the left side of Explorer.
- Activate Windows. Use Software Licensing Management Tool if you get any issue when activating your Windows using default activation feature:
slmgr /ipk XXXXX-XXXXX-XXXXX-XXXXX-XXXXX
slmgr /ato
slmgr /xpr
- Disable Hibernation (powercfg.exe /h off).
- Configure Power options (Hard disk >> Turn of hard disk after: 0, Wireless Adapter Settings >> Power Saving Mode: Maximum Performance, Sleep >> Sleep after: 0).
- Uninstall unnecessary applications.
- Use the manage-bde -status command to show BitLocker status (There is a space between bde and status). Use the manage-bde -off C: command to turn off BitLocker for the C drive.
- Turn on Automatic Logon.
- For a Dell laptop, go to Dell Support, scroll down and enter your Dell laptop service tag, click Search button, click Drivers & Downloads tab, expand Find drivers section, install Dell Command Update, and use it to check and install necessary drivers.
- For Windows Server 2019, install Chipset Device, Graphics, Audio, Ethernet, Bluetooth, Memory Card Reader, Dynamic Platform and Thermal Framework driver.
- For a ThinkPad laptop, install Lenovo Vantage. Set battery charge threshold value to 40% using Lenovo Vantage.
Step 7: Configure Windows for developer’s needs.
- Turn the following Windows features on: .NET 3.5, ASP.NET 4.8, Hyper-V, Internet Information Services, Telnet Client.
- Install Total Commander, Office 365 Offline, MS Project 2016, MS Visio 2016, MS SQL Server 2016, Visual Studio 2022, Adobe Acrobat Pro DC v15.8, Adobe Photoshop CC 2015, TortoiseSVN 1.14.6
- Install Remote Desktop Connection Manager, PuTTY 0.80, WinSCP 6.3.
- Create a VPN connection. Configure the VPN connnection.
- Prevent normal traffic from going through VPN: Go to Control Panel >> Network and Sharing Center >> Change adapter settings >> Right click VPN Connection >> Properties >> Select the Networking tab:
– Disable Internet Protocol Version 6 (TCP/IPv6).
– Select Internet Protocol Version 4 (TCP/IPv4) >> Properties >> Advanced >> IP Settings: Uncheck the Use default gateway on remote network option.
- Install Python 3.6.8, TensorFlow, Keras
- Install Firefox, MPC-HC.1.7.13. (Go to View >> Options >> Player and turn off all options under the History section. Go to View >> Options >> Playback and disable the Auto-zoom feature.)
- Configure secure protocols using IIS Crypto GUI (Select Best Practices, disable TLS 1.0, TLS 1.1, MD5, SHA).
- Install Hyper-V, create an external Virtual Switch for Internet access, set Scheduler Type to Core.
- Apply Windows updates to the machine.
Information:
The bypassnro.cmd which is in \Windows\System32\oobe folder, is a script which contains:
@echo off
reg add HKLM\SOFTWARE\Microsoft\Windows\CurrentVersion\OOBE /v BypassNRO /t REG_DWORD /d 1 /f
shutdown /r /t 0