Motivation:
You want to sync content between your MacBook and iPhone over Wi-Fi.
Solution:
- Connect your iPhone to your MacBook using a USB or USB-C cable.
- In the Finder on your MacBook, select iPhone in the Finder sidebar.
- Click General tab in the button bar.
- Select the Show this iPhone when on Wi-Fi checkbox.
- Click Sync button.
- Unplug your iPhone from your MacBook.
- Restart both devices.
- From now on, when your iPhone and MacBook connect to the same Wi-Fi you will see your iPhone device in the Finder sidebar, and you can sync content between them without having to use a cable.
- Sometimes if your MacBook cannot find your iPhone then just restart your MacBook and it will find your iPhone device again.
Motivation
You want to back up and restore your photos on a MacBook.
Solution:
To back up your images:
- Quit Photos app.
- Go to /Users/yourname/Pictures.
- Copy Photos Library.photoslibrary to your backup location.
To restore your images:
- Quit Photos app.
- Copy Photos Library.photoslibrary from your backup location to your MacBook.
- Hold down the Option key and double-click the Photos app.
- In the Choose Library dialog, select your Photos Library.photoslibrary.
- Click Choose Library button.
To back up your music:
- Quit Music app.
- Go to /Users/yourname/Music.
- Copy Music Library.musiclibrary and Media folder to your backup location.
To restore your music:
- Quit Music app.
- Copy Music Library.musiclibrary and Media folder from your backup location to your MacBook.
- Hold down the Option key and double-click the Music app.
- Click Choose Library… button.
- Select your Music Library.musiclibrary.
- Click Choose button.
- You may also go to Music > Settings… > Files and change Music Media folder location.
Problem: Images copied directly from iPhone to a PC usually have lower quality in comparison with the original quality due to format conversion.
You want to preserve the quality as high as possible.
Solution:
- Connect iPhone to a MacBook.
- Open Photos app.
- Click on iPhone’s name under Devices section on the left.
- Select photos on the right.
- Select Import to = Library or New Album.
- Click on Import N Selected button, where N is the number of selected photos, to Import photos from iPhone to iPhotos.
- The imported photos will be copied from iPhone to iPhotos.
- You have to manually delete the photos directly from iPhone if you want to permanently remove them from iPhone.
- Click on an album name on the left menu in iPhotos.
- Select the imported images in the album.
- Click File > Export > Export N Photos… (N is a number) to export photos from iPhotos to a folder on MacBook.
- Select Arrow icon at the end of Photo Kind
- Select PNG
- Select Color Profile = Original
- Select Size = Full Size
- Select Movie Quality = 4K
- Click the Export button.
- Enter a folder name.
- Click the Export button. Wait for the exporting process to be completed by reviewing the circle icon in the toolbar.
- Share the folder in a LAN.
- Copy the folder to a PC.
Motivation:
You want to sell or give away your MacBook. You want to ensure that the new owner will not access any of your data.
You may also have so many buggy applications on your MacBook and want to increase stability and performance of your macOS.
Procedure:
- Create a backup of data in your machine. You can share your data inside a private network and copy your data to an external drive plugged into a Windows machine. For photos, you can copy your entire Photo Library to an external hard drive. For folders with a large number of files, e.g. Photos Library.photoslibrary or My Mac, you can compress them.
- Sign out of iTunes, iCloud, iMessage, App Store.
- Remove Messages account.
- Restart your machine.
- When your hear startup sound hold Cmd + R until you see progress bar.
- Wait for Recovery screen to show up. This should take only 3 minutes. If you have to wait for 15 minutes and the Recovery screen does not show up then you should log in your current macOS, open App Store app, search for a latest macOS that supports your MacBook model (e.g. macOS Monterey supported devices can be checked here, macOS Ventura supported devices can be checked here), then install it. This download and installation action may take hours.
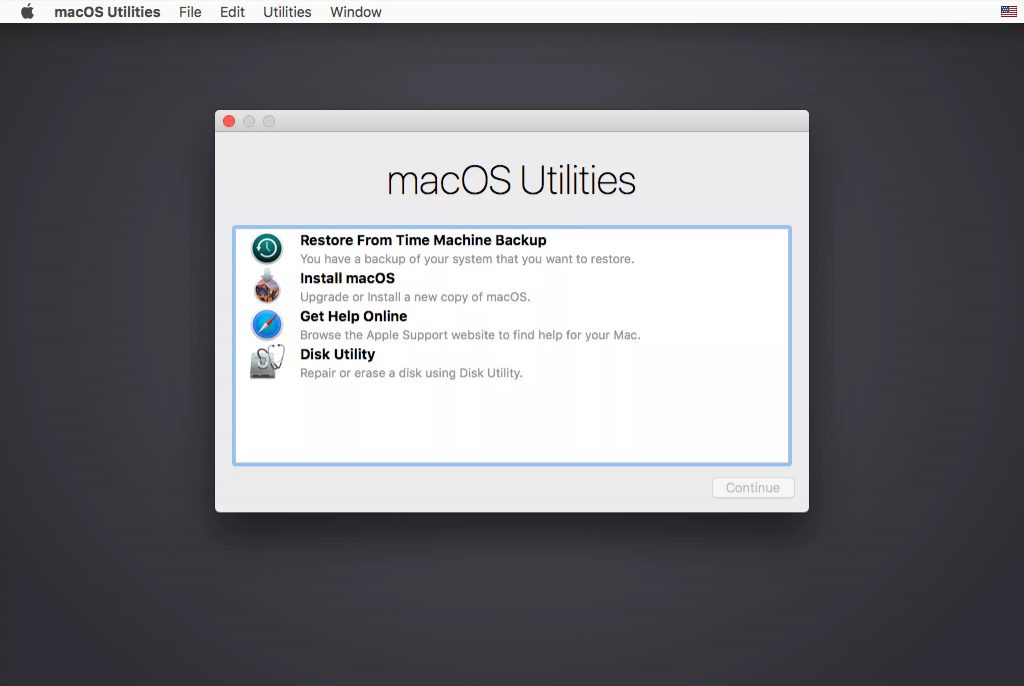
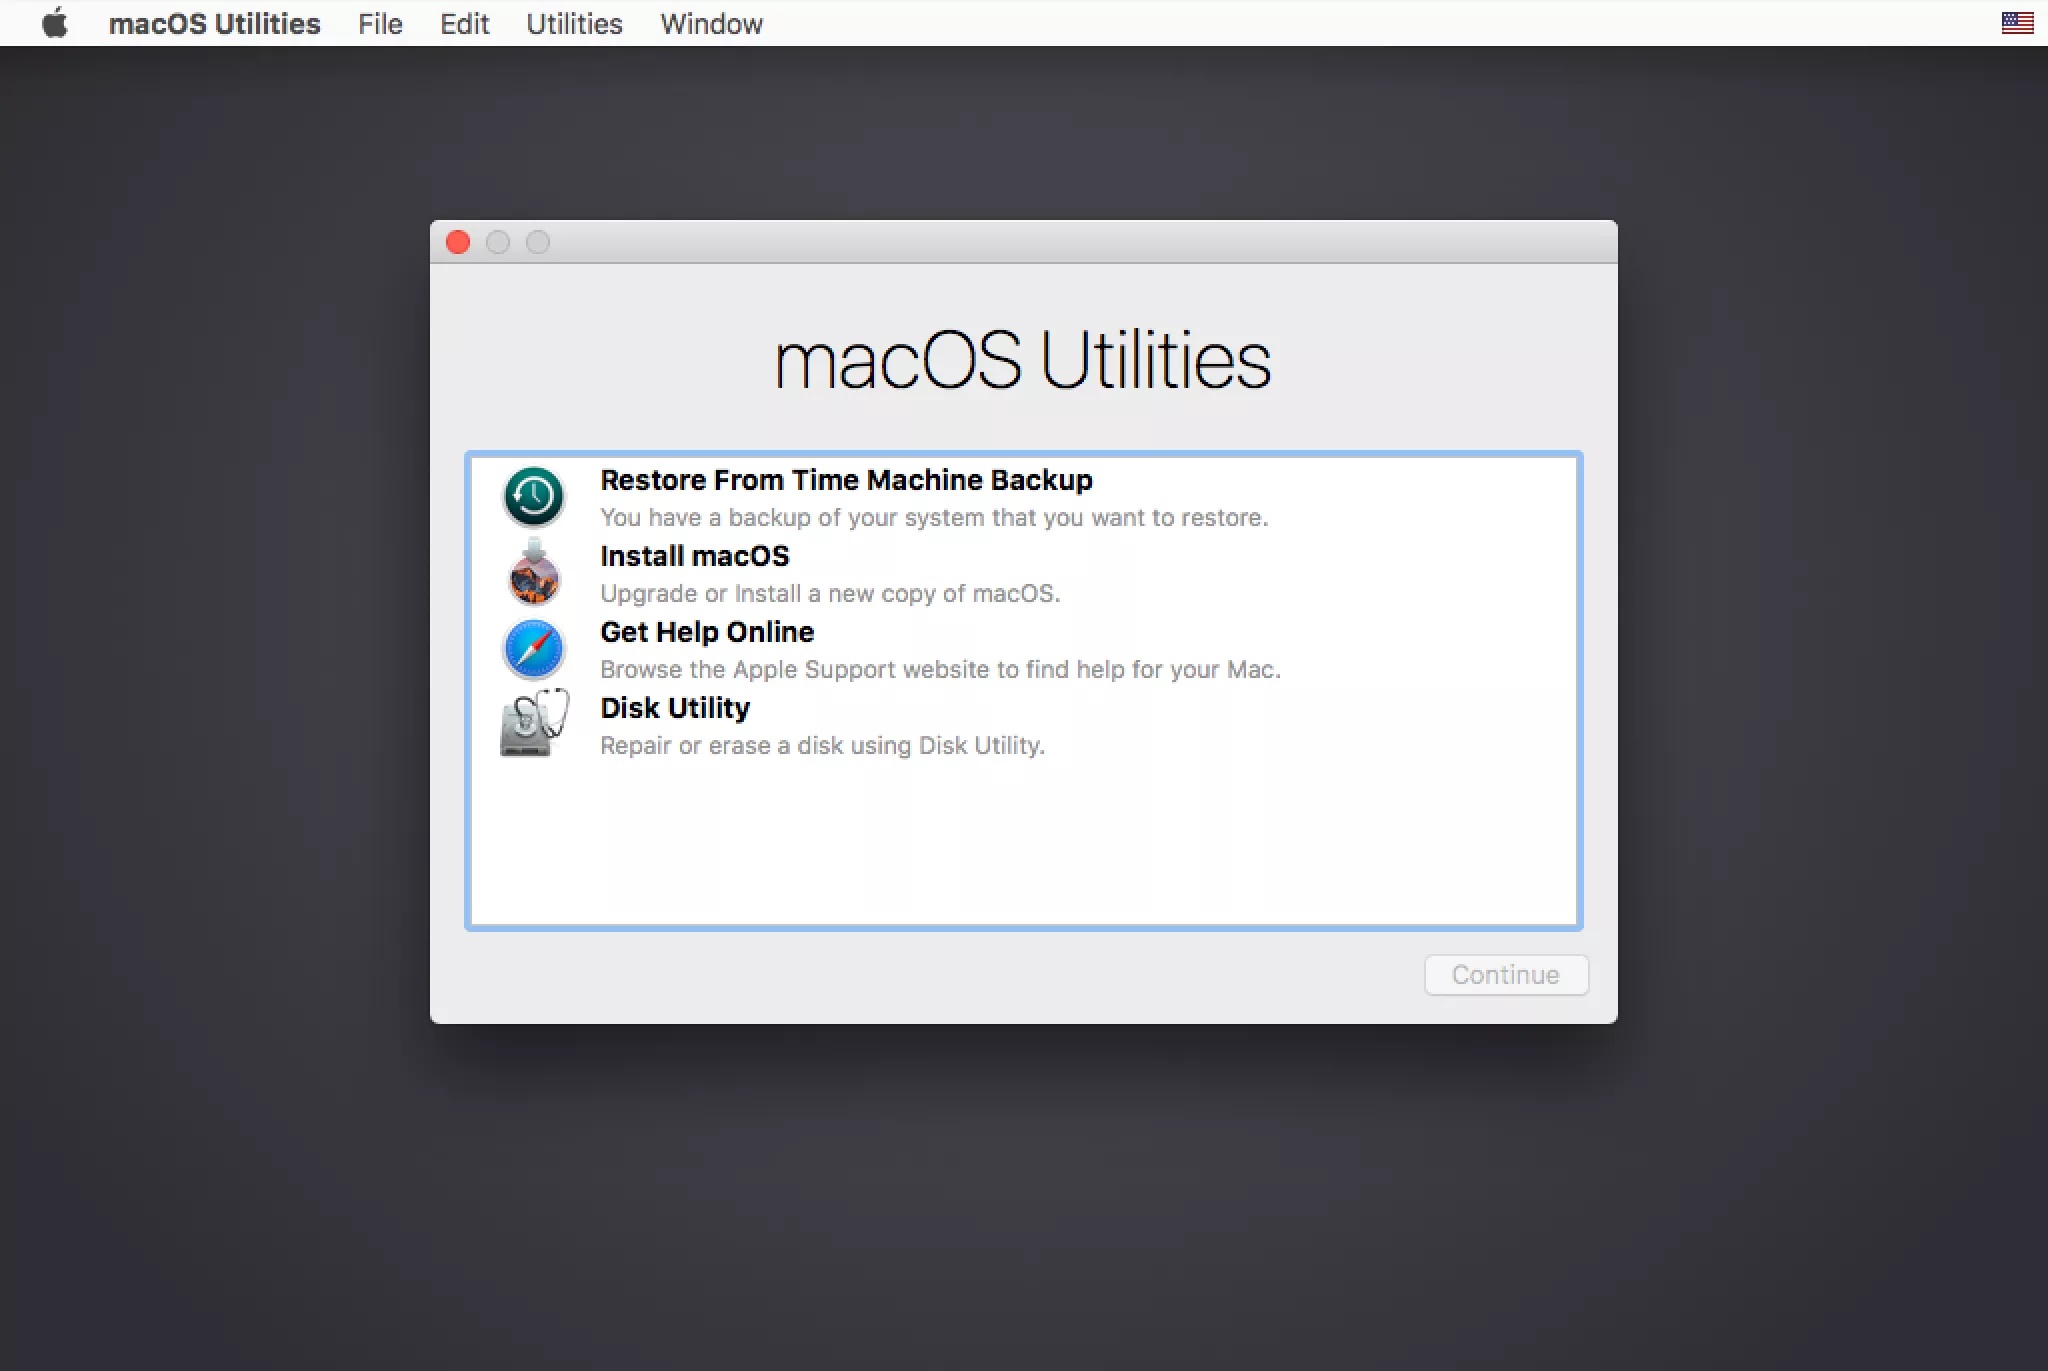
- Click the Disk Utility menu item.
- Click the Continue button.
- Ignore macOS Base System Disk (it will be removed after a new macOS is installed).
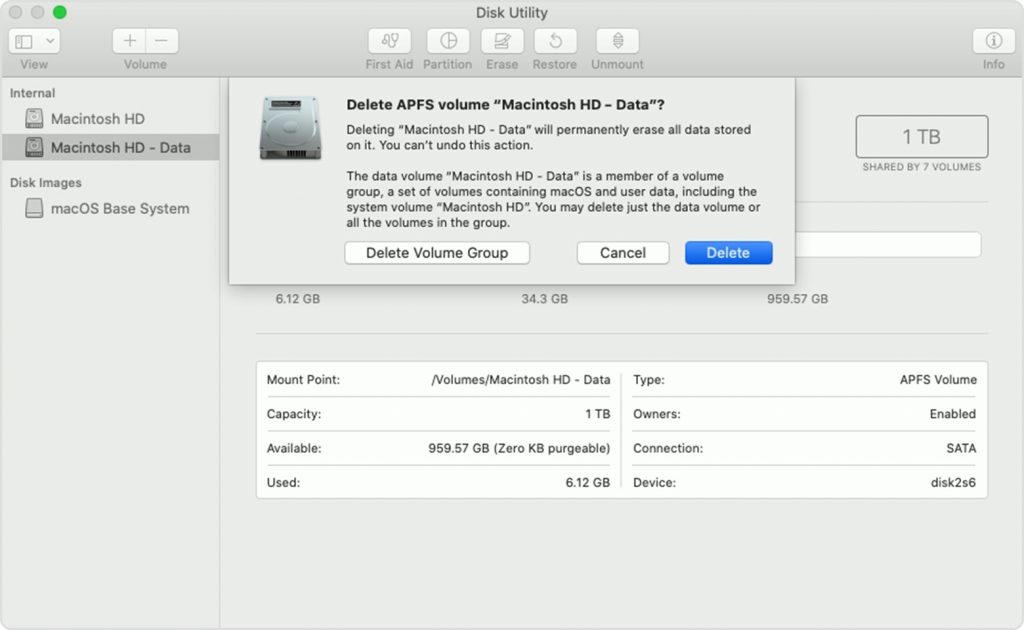
- Click a volume (e.g. Macintosh HD – Data). Exapnd Macintosh HD if you do not see Macintosh HD – Data.
- Click the minus (-) button on the tool bar above the Volume label.
- Click the Delete Volume Group button.
- Click the Done button.
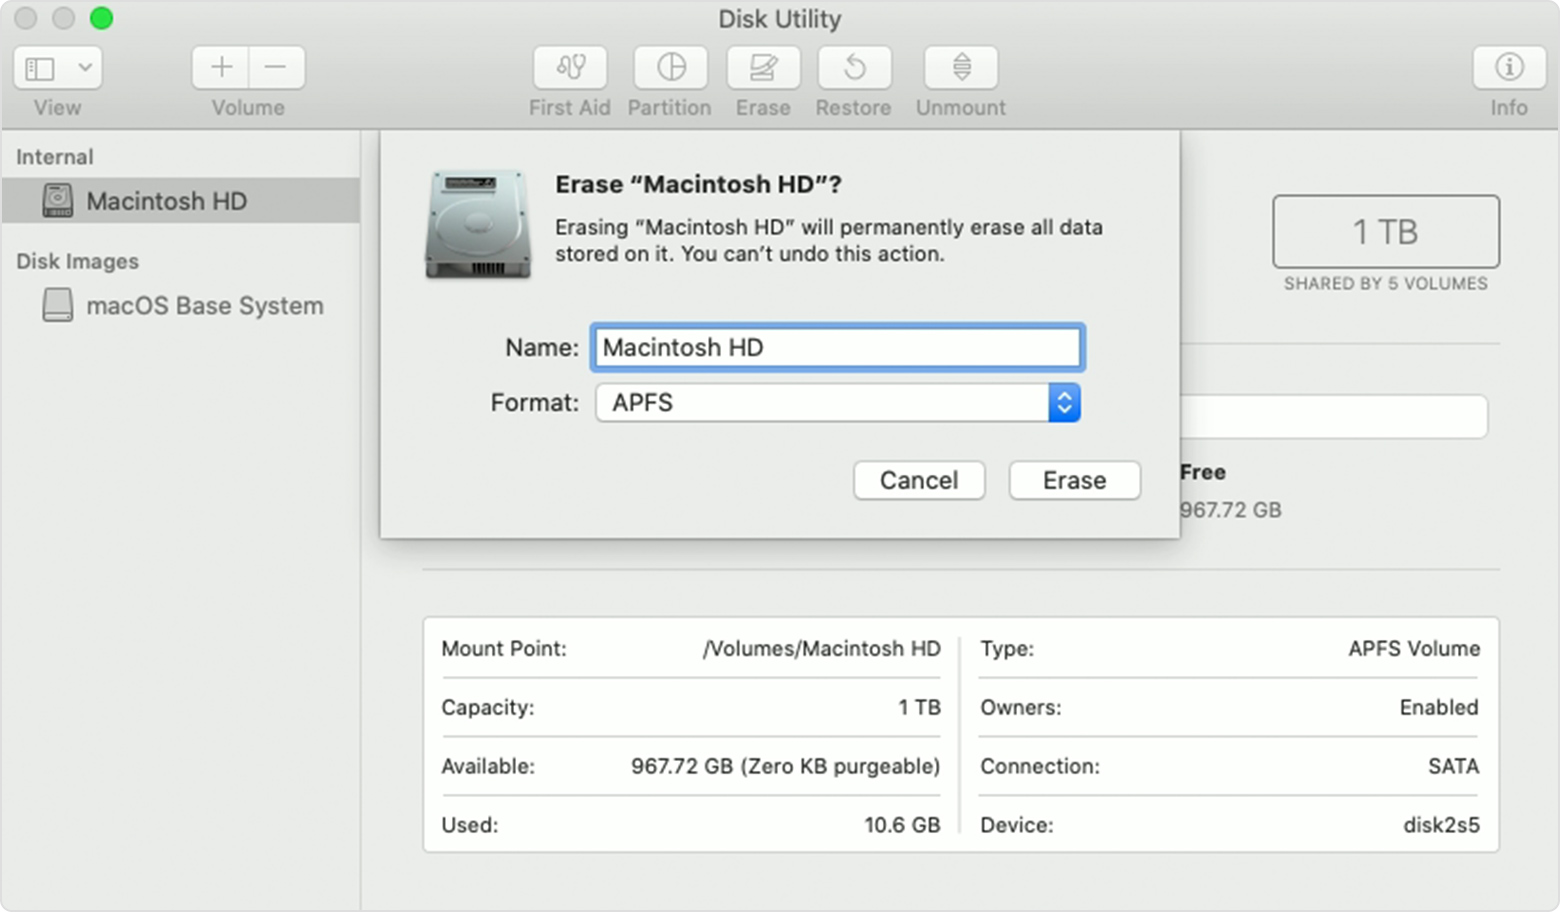
- Click a volume (e.g. Container disk2).
- Click the Erase button on the tool bar.
- Set Name = Macintosh HD, Format = APFS.
- Click the Erase button.

- APFS, or “Apple File System”, is one of the new features in macOS High Sierra. It is optimized for solid state drives (SSDs) and other all-flash storage devices.
- Click the Done button.
- Click the top left red Close icon to close the Disk Utility.
- Click Install macOS (or Reinstall macOS) menu item.
- Click the Continue button and follow the instructions to install a clean macOS.
Post Installation Configuration:
- Go to System Preferences > Trackpad. Select Tap to click.
- Go to Users & Groups. Click on the lock icon. Enter administrative password. Click Login Options. Select an account for Automatic login.
- Go to Energy Saver. Select Prevent computer from sleeping automatically when the display is off. Uncheck Put hard disks to sleep when possible.
- Quit Photos. Hold down the Option key and open Photos. Click the Other Library… button and select a backup of your photos. Click the Open button.
- Open Music > Preferences… > Files. Uncheck Copy files to Music Media folder when adding to library.
- Go to System Preferences > Sharing. Select File Sharing. Remove all folders under Share Folders. Click the Options… button. Select On for an account under Windows File Sharing. Click Done.
Motivation:
You have a MacBook and you want to use an application that only works on Windows.
Prerequisites:
- Boot Camp requires MacBook model which has an Intel processor. Please ensure that your MacBook model is one of the following models listed here.
- On your MacBook, click Apple icon, then click About This Mac, and ensure that an item labeled Processor, not Chip, is shown, as described here.
Procedure:
1. Update your MacBook
- Ensure that your macOS is up-to-date and does not have any issue.
- If you want to reinstall macOS then you can hold down Command+R after powering your machine on.
2. Install Windows on your MacBook using Boot Camp
On macOS:
- Finder > Shift+Command+u > Boot Camp Assistant
- Select 350Gb (or another appropriate size) for Windows. Use Windows 10 version 1909, April 2020 or Windows 10 version 1709, November 2017.
- Remove unnecessary macOS applications (e.g. Numbers, Pages, Garage Band) if you want to use as much as possible storage for Windows.
- Install Windows 10.
– DO NOT USE Disk Management to create new partitions during Windows installation. Only use Disk Management to format an existing partition when installing Windows.
– During the next boot into OS X, the OSXRESERVED partition is removed and put back into the Core Storage container of the OS X partition.
On Windows:
- Install Boot Camp drivers.
- Click Boot Camp icon. Click Boot Camp Control Panel… > TrackPad > Tap to Click > Apply > OK.
- Change Computer Name, disable System Protection, enable Remote Desktop, activate Windows.
- Optionally press Win + R and type “msconfig” then click OK. Then Select the Boot tab and delete unnecessary OS boot item.
- Turn on Automatic Logon
Command Prompt (Run as Administrator) >> netplwiz
- Disable Hibernate
Command Prompt (Run as Administrator) >> powercfg.exe /hibernate off
- Power management > Change plan settings > Change advanced power settings
>> Hard disk > Turn of hard disk after > Never
>> Sleep > Sleep after > Never
- Adjust System > Display > Brightness and color.
- Uninstall unnecessary apps.
- Use Disk Management to shrink the BOOTCAMP partition and create a new DATA partition. Use 150Gb (153600MB) as the amount of space to shrink.
- Check and install Windows updates.
- Copy portable apps.
Installing developer’s tools:
- Turn the following Windows features on: ASP.NET 3.5, 4.7, Internet Information Service, Telnet Client
- Install Hyper-V, create an external Virtual Switch for Internet access
- Install Total Commander, Remote Desktop Connection Manager
- Install Firefox
- Install MS SQL Server 2008 R2, MS Office 2007 SP3 (Display >> Scale and layout: 175%), MS Project 2016, MS Visio 2016, Visual Studio 2010, Visual Studio 2015, Adobe Acrobat Pro DC v15.8, Adobe Photoshop CC 2015, TortoiseSVN 1.11.1
- Install Python 3.6.8, TensorFlow, Keras
3. Remove Windows from your MacBook using Boot Camp
On Windows:
- Delete all Windows Data partitions, then Extend the Boot Camp volume (C:\) using Windows Disk Management.
On macOS:
- Finder > Shift+Command+u > Boot Camp Assistant > Continue > Restore
- If you get any problem with Boot Camp Assistant then delete Windows Boot Camp partition using Disk Utility: Finder > Shift+Command+u > Disk Utility > Partition.
- If you get a “Ghost” partition after deleting Windows Boot Camp partition using Disk Utility then please use the following procedure to remove it:
Execute below command:
diskutil list
Find EFI IDENTIFIER (e.g. disk0s1).
Execute 2 below commands:
sudo mkdir /Volumes/efi
sudo mount -t msdos /dev/disk0s1 /Volumes/efi
Navigate to /Volumes/efi/EFI. Delete all directories (i.e. Microsoft and Boot) except the APPLE directory.
Execute below command:
diskutil unmount /Volumes/efi
4. Repair or update Boot Camp drivers on Windows
- Download and install 7-Zip.
- Download Brigadier 0.2.4.
- Run Brigadier to automatically detect your Mac model and download the right Boot Camp drivers for Windows 10, and extract them (using 7-Zip) to the same location where Brigadier executable is located.
- Find and double-click on Setup.exe to run it.
Software development and software engineering research