Motivation:
Any changes related to an operating system or an application in an EC2 instance may break its connection. You may try to stop, start, or reboot the instance many times but the problem may still persist. In this case, you may need to restore the instance to a previous stable version.
Viruses, malwares or accidental deletion of data may also require a restore of an instance to a previous stable version.
In order to restore an EC2 instance to a previous version you first need to create its backups either manually or automatically.
Manually backup an EC2 instance:
- Click Volumes on the left menu.
- Click a volume, click Actions, click Create Snapshot.
Manually restore an EC2 instance:
- Click Snapshots on the left menu, click a snapshot of an instance.
- Click Actions, click Create Volume.
- Let all default settings intact, click Create Volume.
- Repeat the first 3 steps for all the snapshots of the instance.
- Stop the instance.
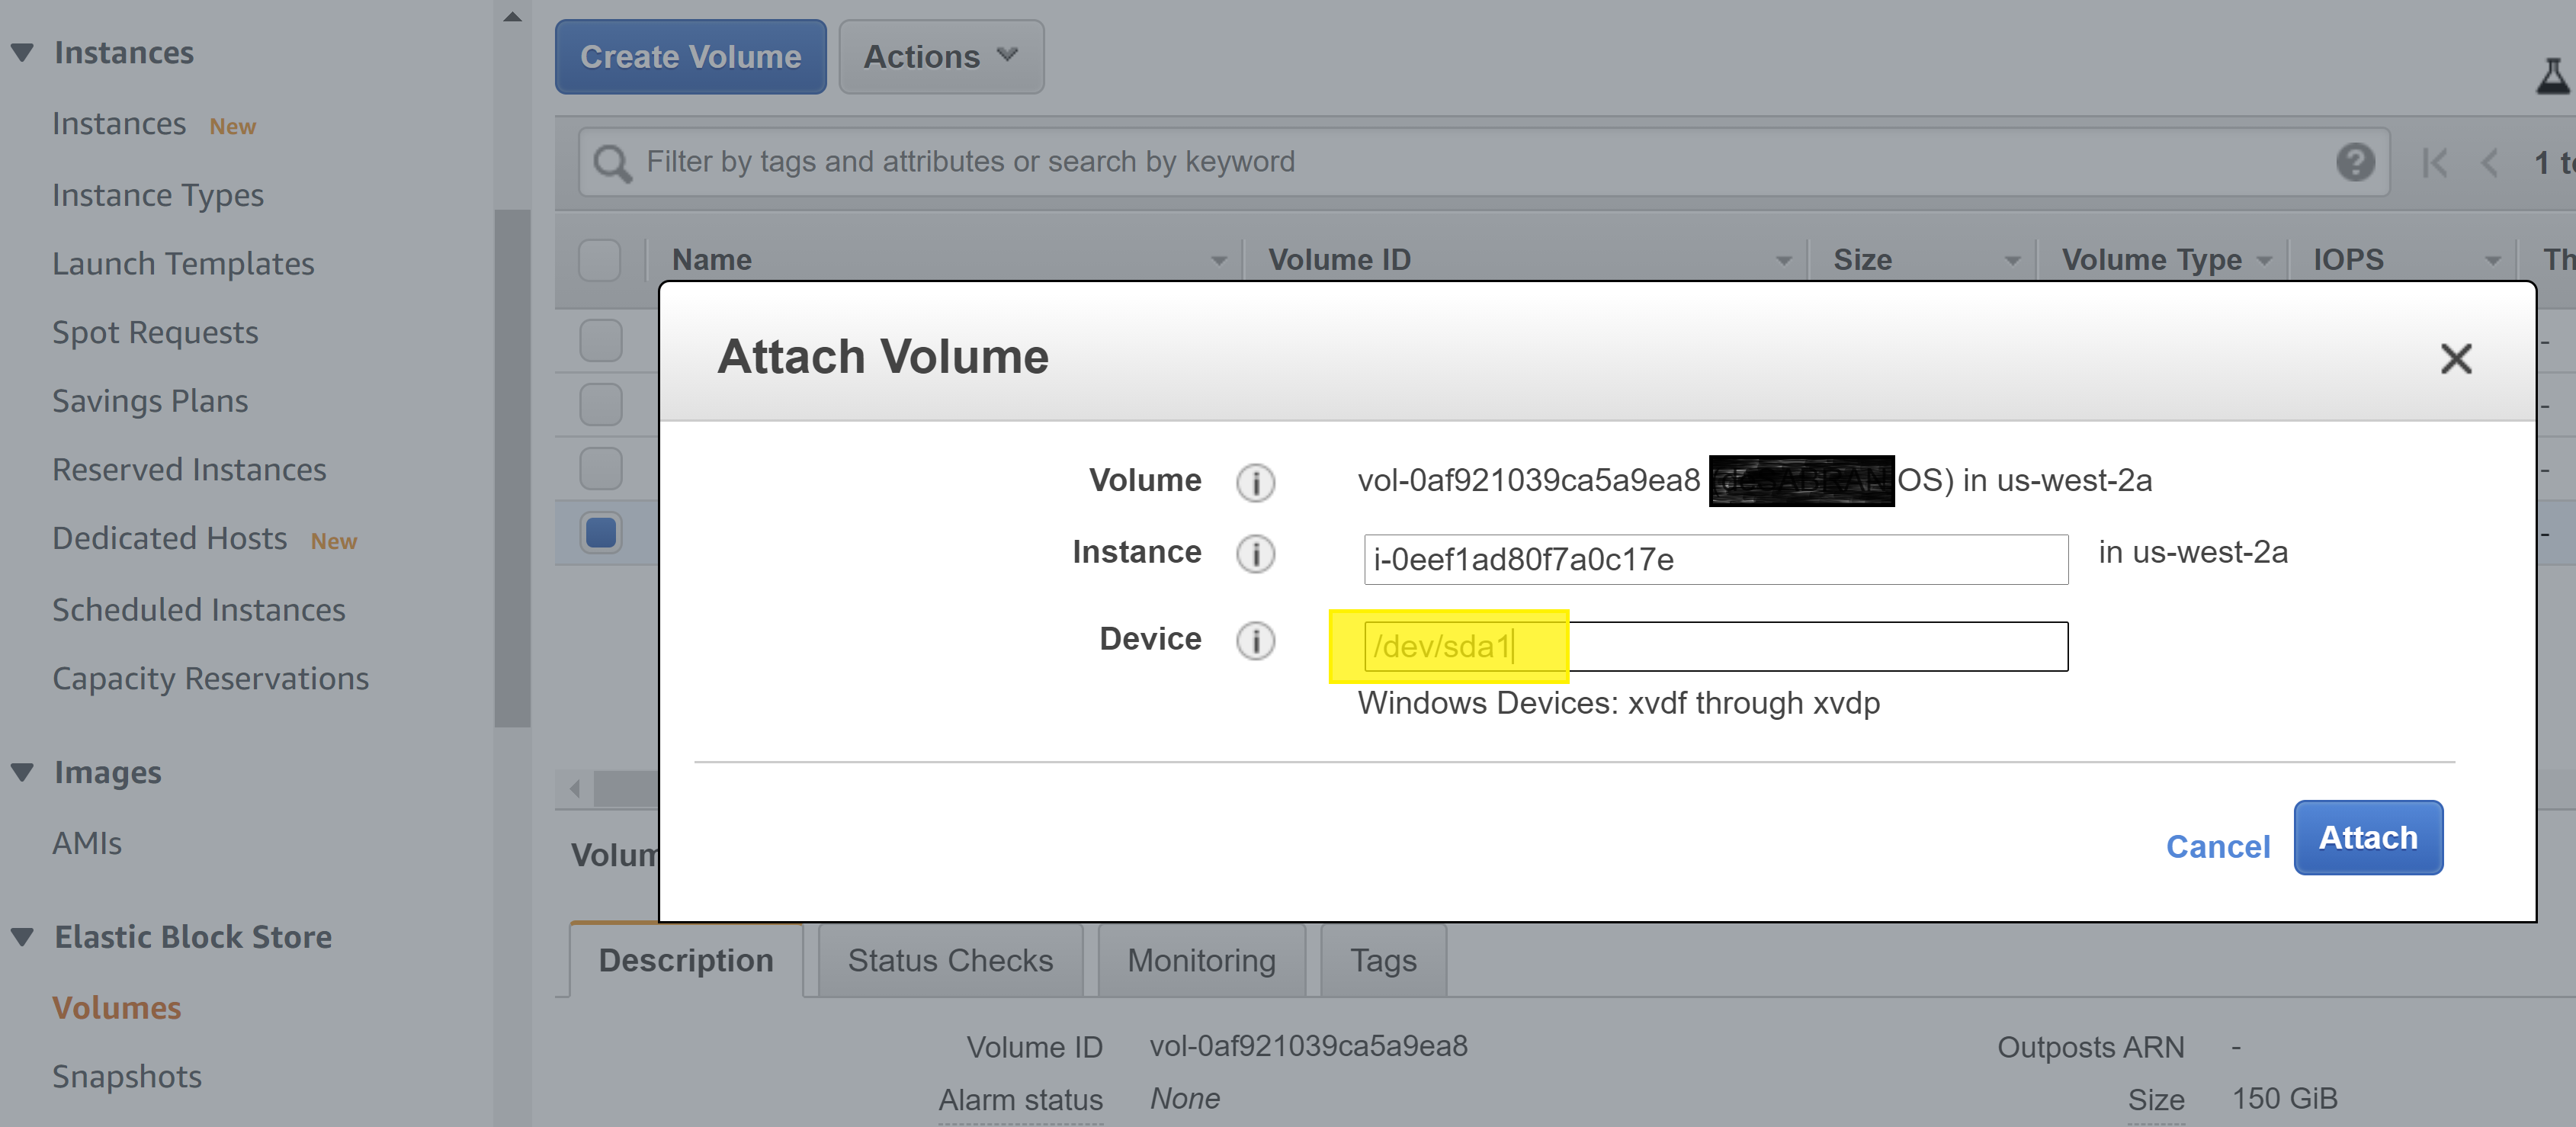
- Click the instance, click Storage, scroll down and click on the link of /dev/sda1 device.
- Click Actions, click Detach Volume (or Force Detach Volume if the Detach Volume function does not work).
- Click Volumes on the left menu.
- Click on the volume created from the snapshot.
- Click Actions, click Attach Volume.
- Select the instance, set Device = /dev/sda1, click Attach.
12. Detach and attach the remaining volume to the instance.
13. Start the instance.
Automate backup process for an EC2 instance:
- Go to AWS Backup service.
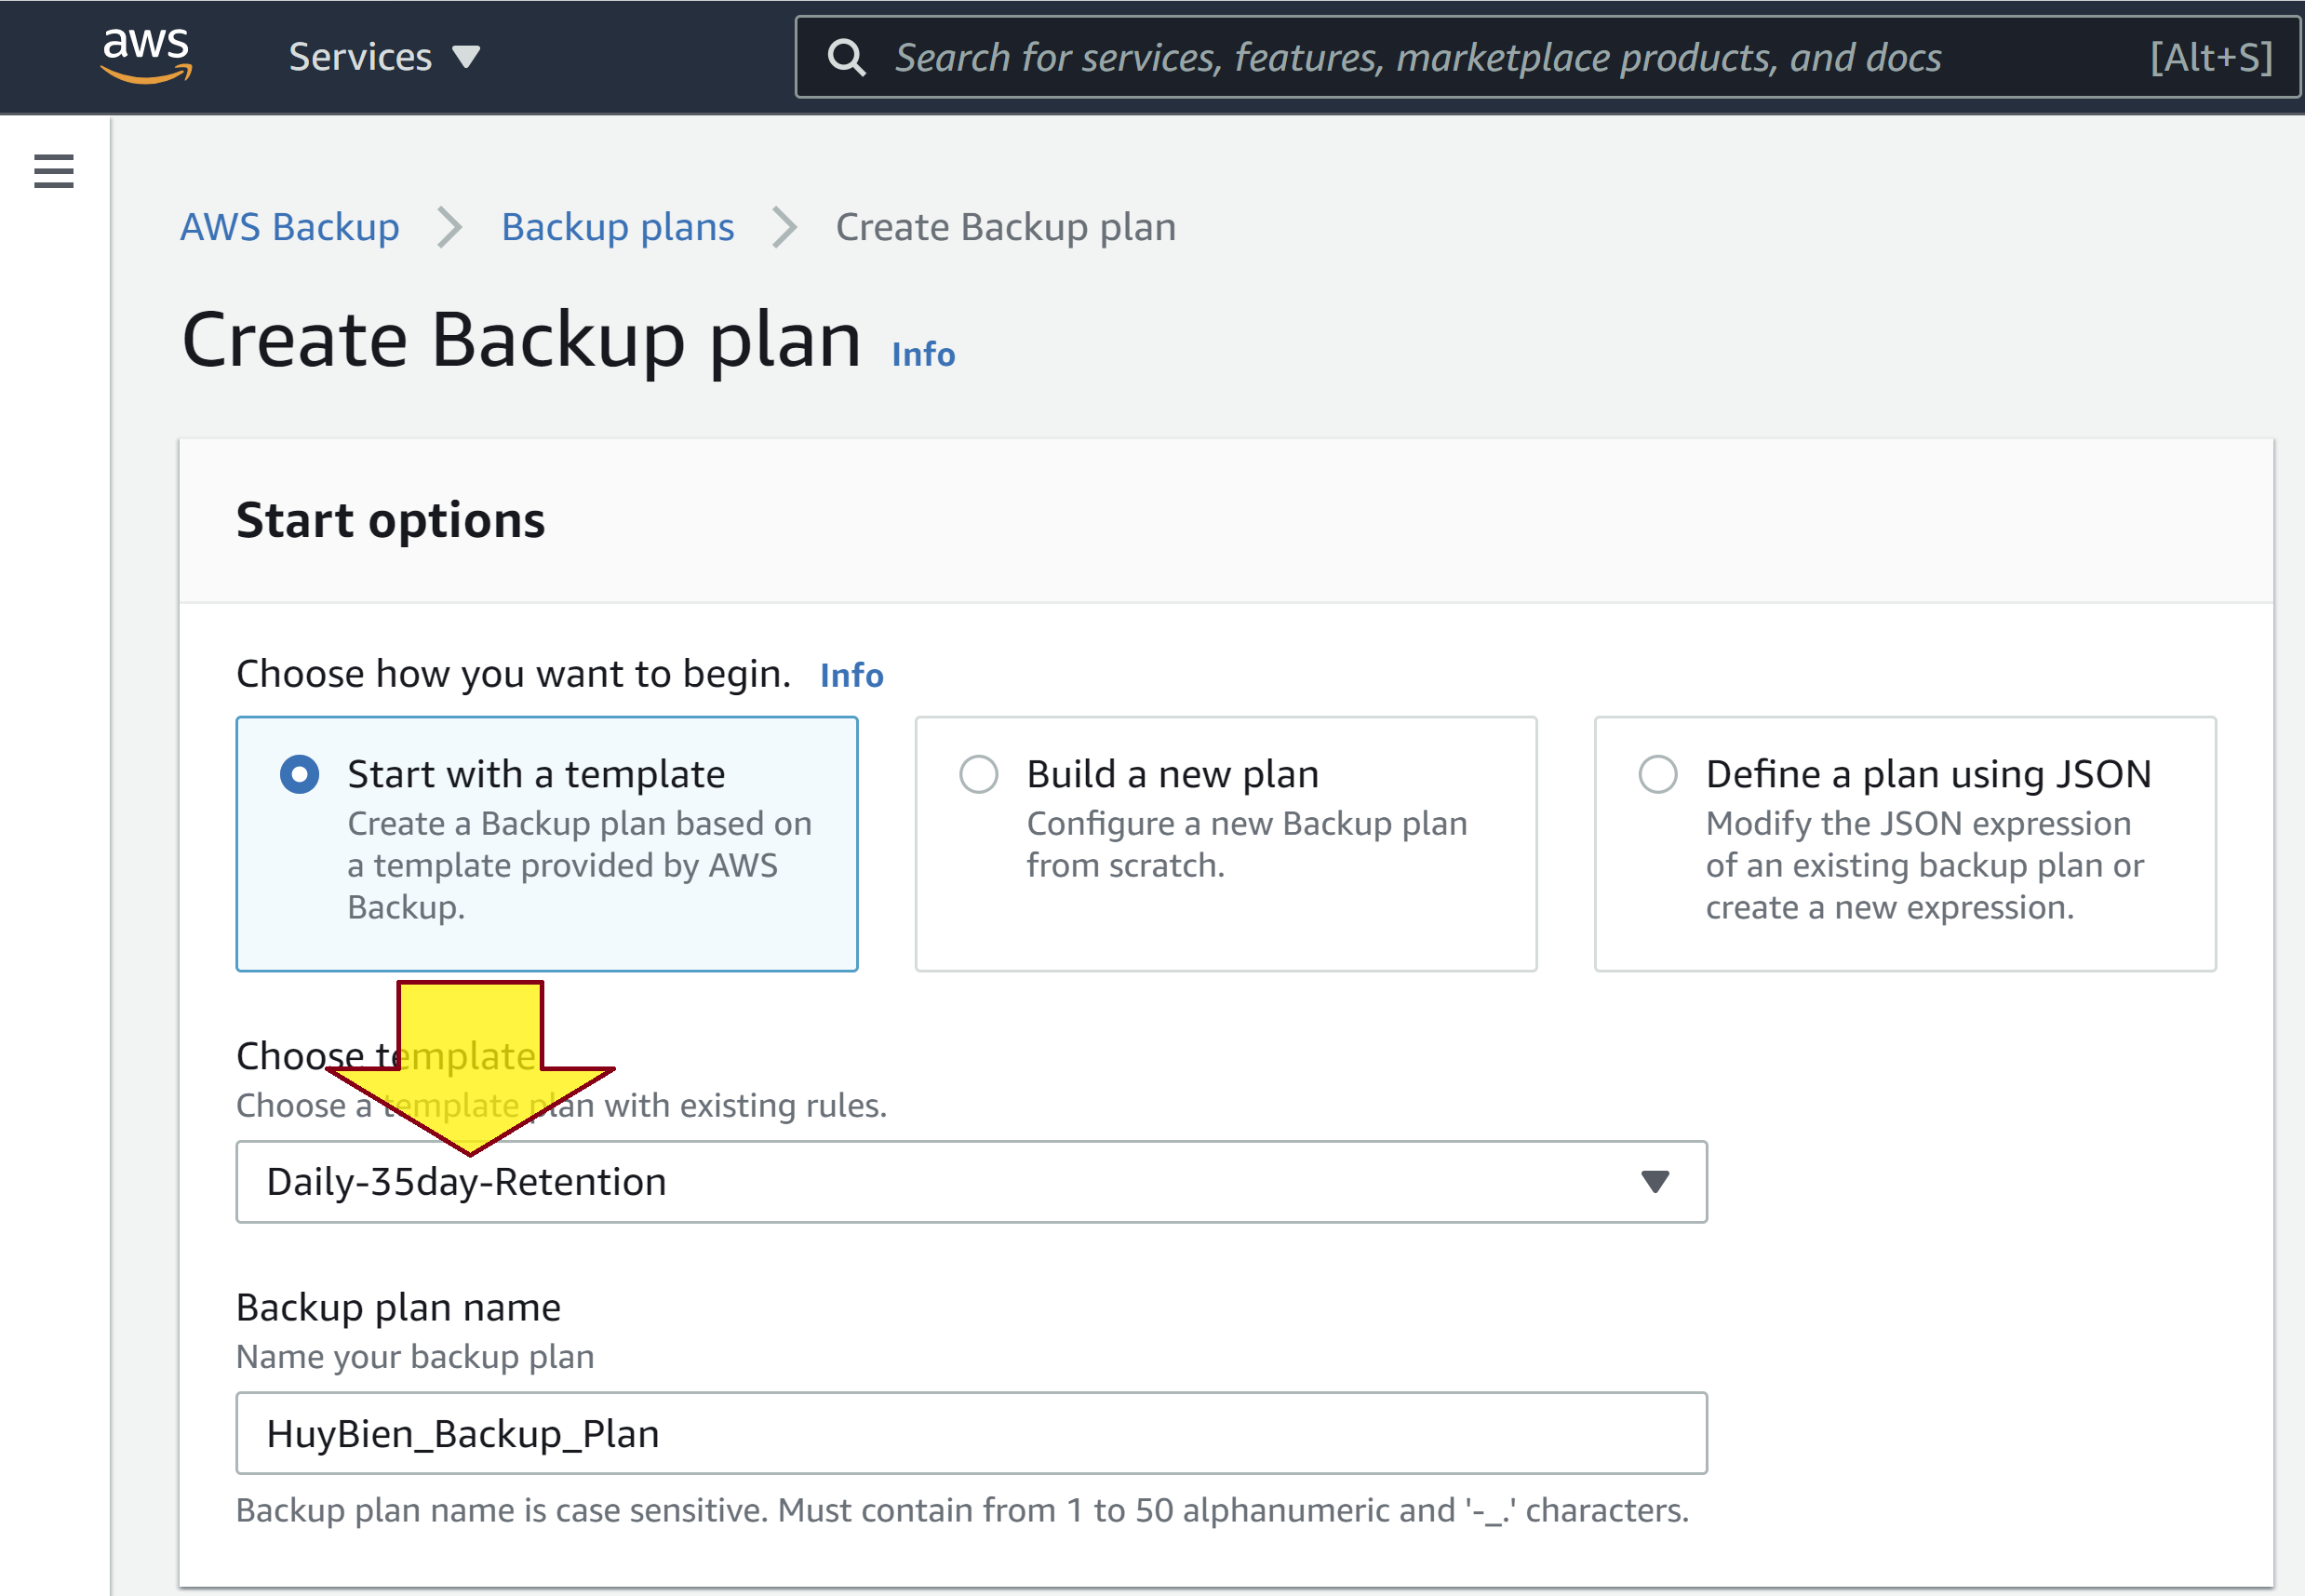
- Click Backup plans on the left menu.
- Click the Create Backup plan button, select a template (e.g. Daily-35day-Retention), enter a backup plan name (e.g. HuyBien_Backup_Plan).
4. Click Backup plans on the left menu, click on a backup plan name.
5. Scroll down to the Resource assignments section, click the Assign resources button.
6. Enter a resource assignment name (e.g. HuyBien_Instances or HuyBien_Volumes), the scroll down to the Assign resources section.
7. Select Resource ID for Assign by.
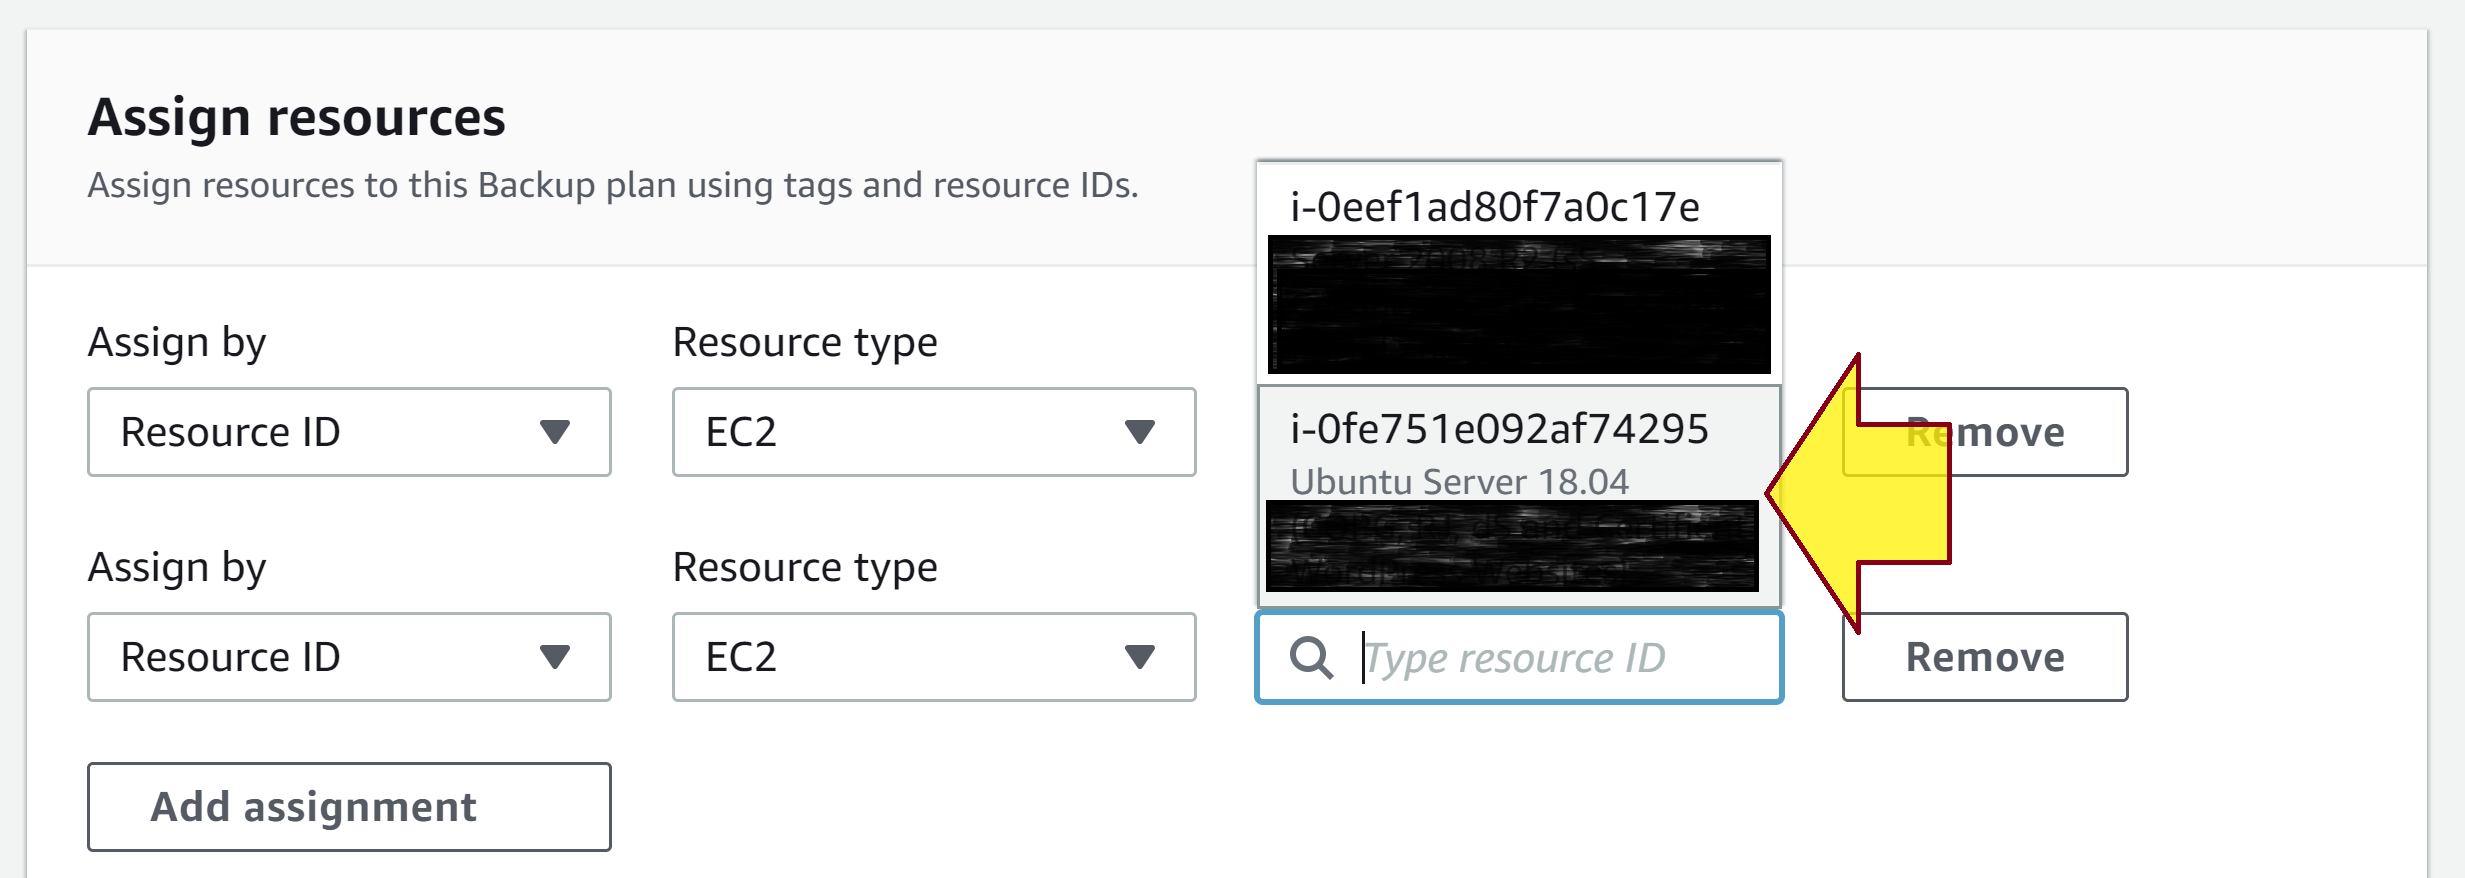
8. Select appropriate resources. When you select an EC2 instance, AWS Backup will create backup for all EBS volumes attached to the instance, and then will attach them to an AMI that stores all parameters from the original EC2 instance.
9. Click the Assign resources button.
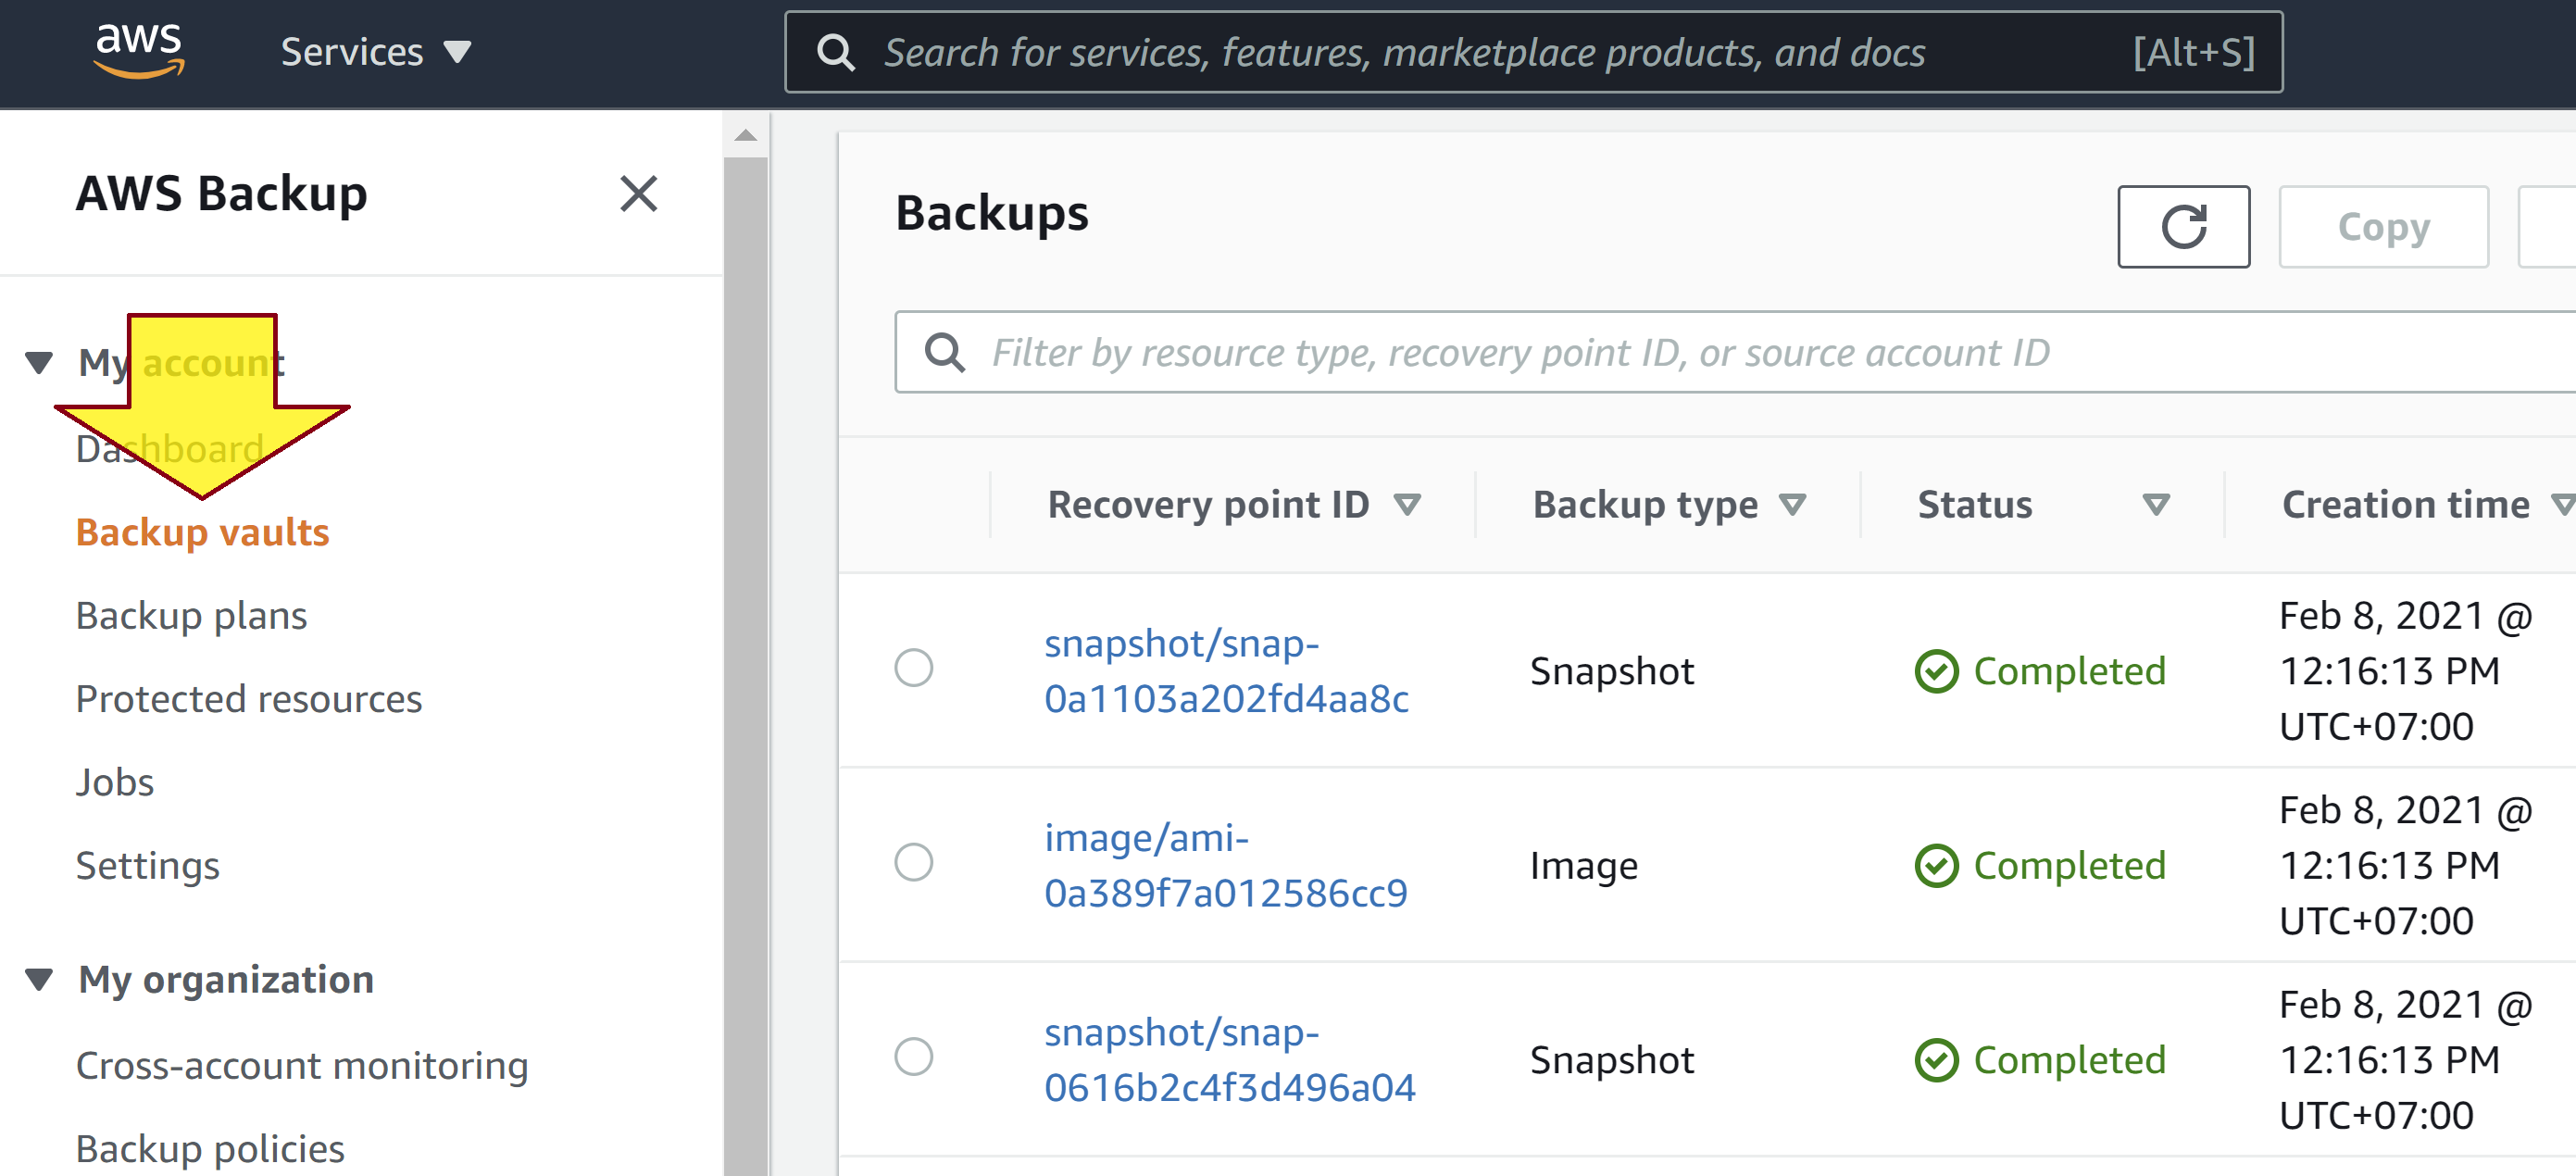
10. Wait for 1 day, then click on the Backup vaults link on the left menu, click a Backup vault name, scroll down to the Backup section to check for backups of the resources created by the backup plan execution.
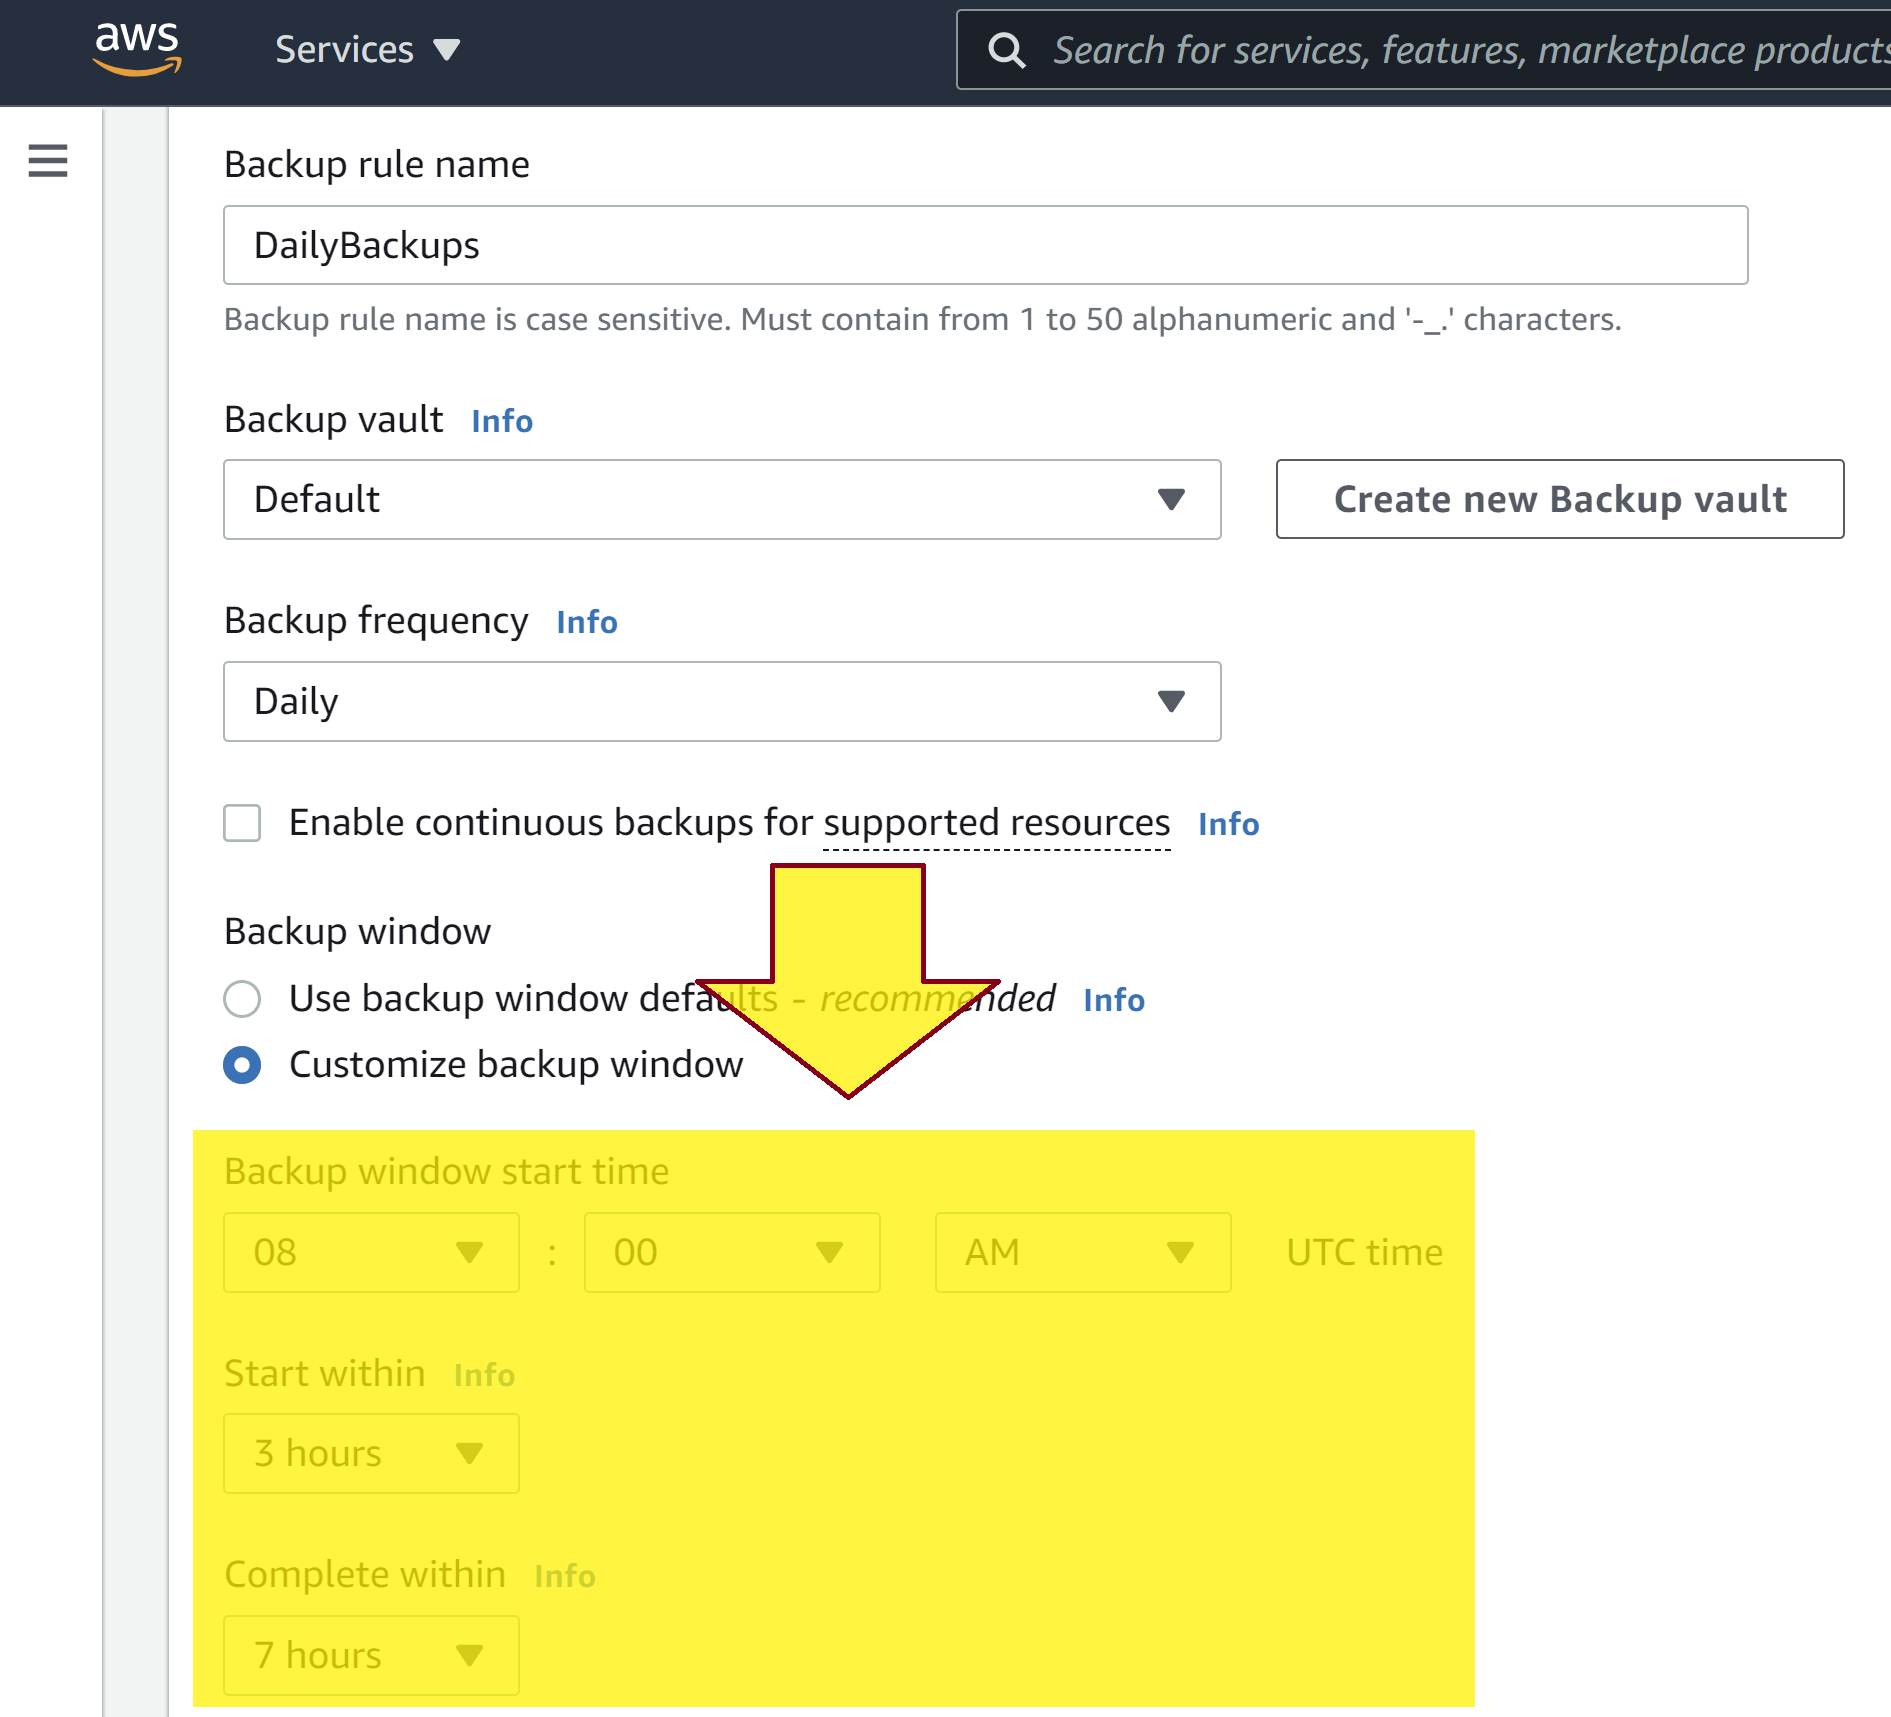
Configure backup process time:
- Go to https://www.thetimezoneconverter.com/, and convert your time to UTC, for example 1:00 AM Saint Petersburg = 10:00 PM UTC.
- Go to AWS Backup, click Backup plans, click on a plan name.
- Scroll down to Backup rules, select a rule, click the Edit button.
- Scroll down to Backup window, click Customize backup window and enter your times.