Motivation:
You want to sell or give away your MacBook. You want to ensure that the new owner will not access any of your data.
You may also have so many buggy applications on your MacBook and want to increase stability and performance of your macOS.
Procedure:
- Create a backup of data in your machine. You can share your data inside a private network and copy your data to an external drive plugged into a Windows machine. For photos, you can copy your entire Photo Library to an external hard drive. For folders with a large number of files, e.g. Photos Library.photoslibrary or My Mac, you can compress them.
- Sign out of iTunes, iCloud, iMessage, App Store.
- Remove Messages account.
- Restart your machine.
- When your hear startup sound hold Cmd + R until you see progress bar.
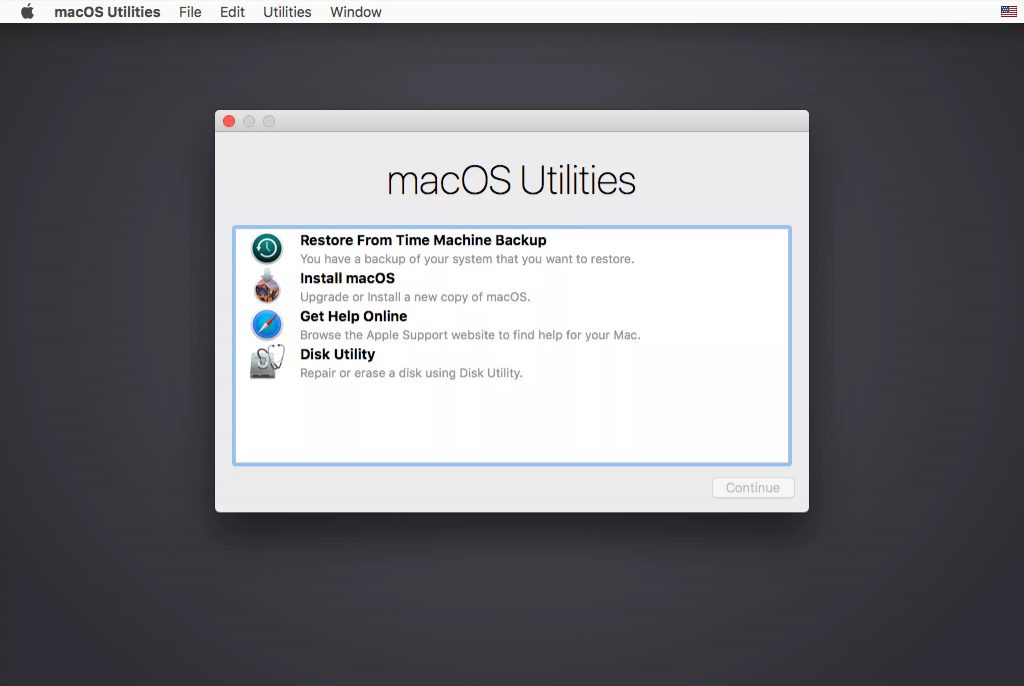
- Wait for Recovery screen to show up. This should take only 3 minutes. If you have to wait for 15 minutes and the Recovery screen does not show up then you should log in your current macOS, open App Store app, search for a latest macOS that supports your MacBook model (e.g. macOS Monterey supported devices can be checked here, macOS Ventura supported devices can be checked here), then install it. This download and installation action may take hours.
- Click the Disk Utility menu item.
- Click the Continue button.
- Ignore macOS Base System Disk (it will be removed after a new macOS is installed).
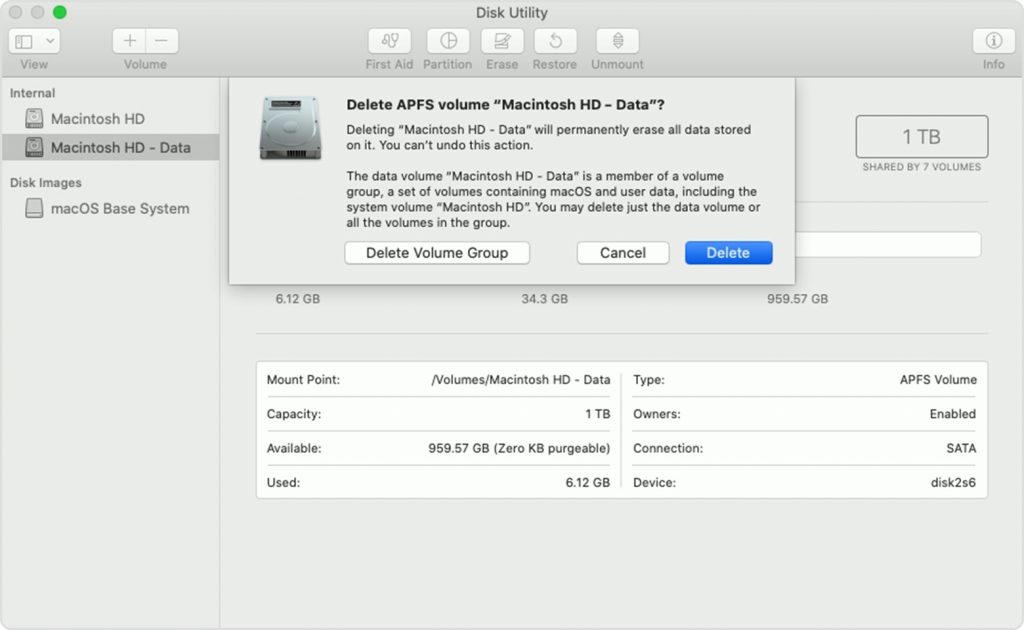
- Click a volume (e.g. Macintosh HD – Data). Exapnd Macintosh HD if you do not see Macintosh HD – Data.
- Click the minus (-) button on the tool bar above the Volume label.
- Click the Delete Volume Group button.
- Click the Done button.
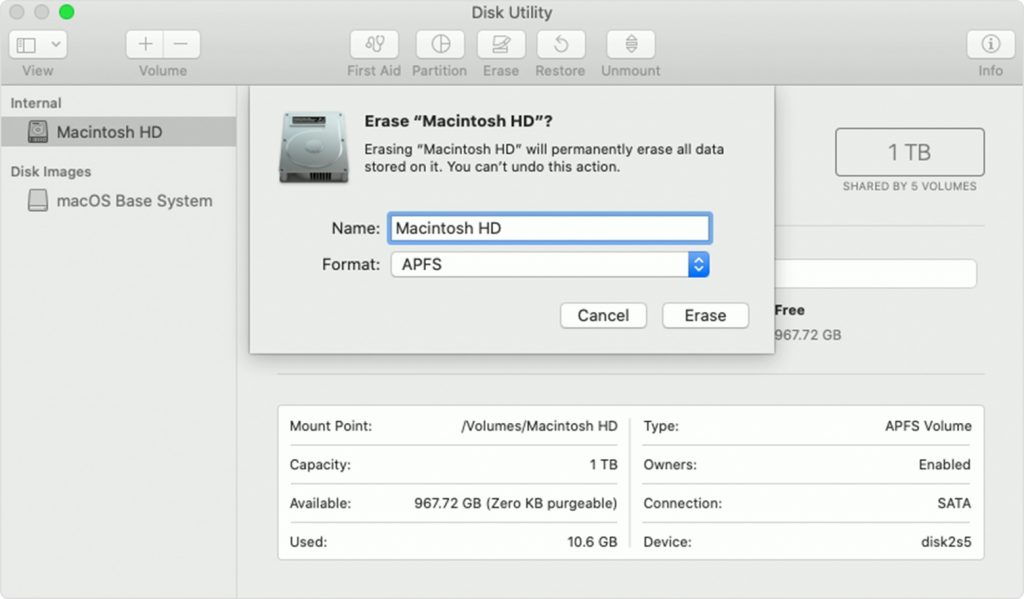
- Click a volume (e.g. Container disk2).
- Click the Erase button on the tool bar.
- Set Name = Macintosh HD, Format = APFS.
- Click the Erase button.
- APFS, or “Apple File System”, is one of the new features in macOS High Sierra. It is optimized for solid state drives (SSDs) and other all-flash storage devices.
- Click the Done button.
- Click the top left red Close icon to close the Disk Utility.
- Click Install macOS (or Reinstall macOS) menu item.
- Click the Continue button and follow the instructions to install a clean macOS.
Post Installation Configuration:
- Go to System Preferences > Trackpad. Select Tap to click.
- Go to Users & Groups. Click on the lock icon. Enter administrative password. Click Login Options. Select an account for Automatic login.
- Go to Energy Saver. Select Prevent computer from sleeping automatically when the display is off. Uncheck Put hard disks to sleep when possible.
- Quit Photos. Hold down the Option key and open Photos. Click the Other Library… button and select a backup of your photos. Click the Open button.
- Open Music > Preferences… > Files. Uncheck Copy files to Music Media folder when adding to library.
- Go to System Preferences > Sharing. Select File Sharing. Remove all folders under Share Folders. Click the Options… button. Select On for an account under Windows File Sharing. Click Done.
(Visited 249 times, 1 visits today)


